Graphical User Interface
If you prefer a visual experience over the terminal, the PyCOMPSs CLI includes a built-in Graphical User Interface (GUI). This tool allows you to perform all the same actions as the CLI through an intuitive, point-and-click interface.
🚀 Getting Started
Launching the GUI is simple. Just run the following command in your terminal:
$ pycompss --gui
This will open a window where you can manage your environments, launch applications, and analyze your results without needing to remember complex command-line arguments.

Figure 75 The PyCOMPSs CLI Graphical User Interface (GUI).
🌟 Main Features
The GUI is organized into several intuitive sections. Here is a detailed guide to its functionality:
Dashboard Setup
Language selector: Choose your preferred language (English, Catalan, or Spanish).
Theme selector: Customize the visual style of the dashboard.
Information
Manual: Quick access to the official COMPSs documentation.
About: Information about the development team.
Output: A console-style window that displays the real-time logs of the CLI.
Output setup: Options to clear the log, enable verbosity, or hide sensitive information.
Information: Displays supported environments, a footbar with helpful hints, and overall progress.
Environment Management
Avoid the need for flags by managing your execution contexts directly through the Environment buttons.
Create: Use the initialization wizard to set up Local, Docker, Remote, or Unicore environments.
Switch: Select a target environment from the dropdown menu to activate it.
Remove: Delete the currently selected environment.
Tutorial: Enter a tutorial name to automatically set up its associated environments and materials.
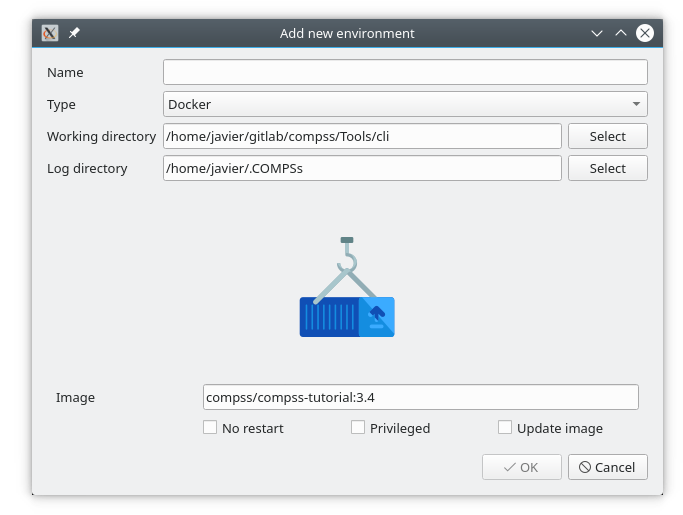
Figure 76 Adding a new environment.

Figure 77 Setting up environments associated with a tutorial.
Action Management
The GUI uses a tab-based action selector that dynamically updates to show only the actions available for the currently active environment.
Install COMPSs
Perform dependency checks and install COMPSs without leaving the GUI:
Profile selector: Choose the installation profile (e.g., full, Java, Python, etc.).
Version selector: Select the specific COMPSs version to be installed.
Check dependencies: Run the dependency checker to ensure the system is ready.
Target directory: Define the installation path (this field is enabled only after the dependency check succeeds).
Install COMPSs: Execute the installation process.

Figure 78 Installing COMPSs through the GUI.
Command Execution
Running individual commands in the active environment is as simple as entering the text and clicking Execute.
Command input: Define the exact command to be executed.
Execute: Launch the specified command.
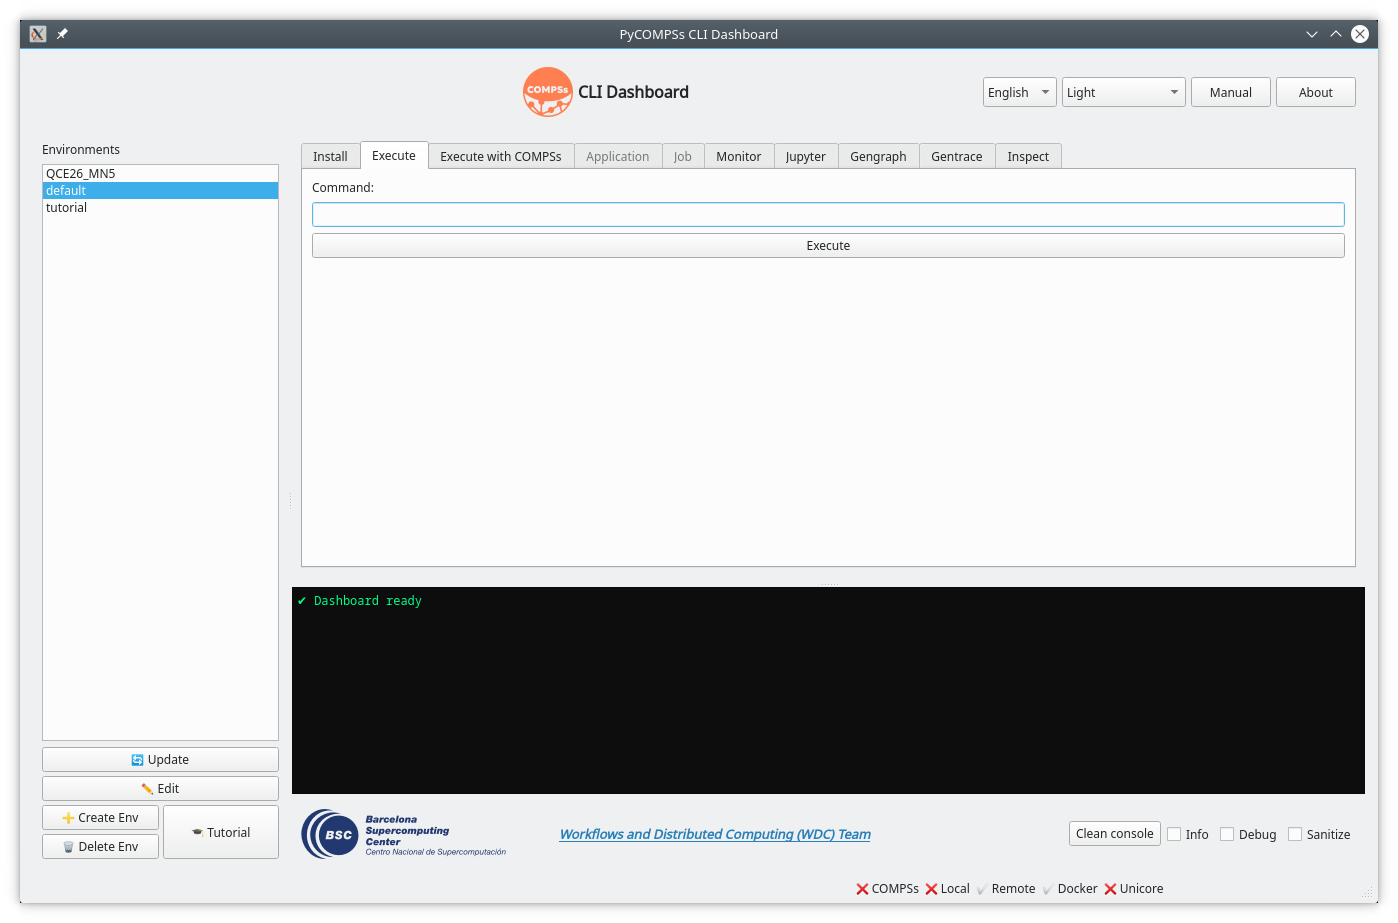
Figure 79 Executing a command through the GUI.
Application Execution
Launch COMPSs applications by defining their parameters and clicking Execute with COMPSs.
Quick Run: Select the application file and provide the required parameters.
Custom Flags: Enable options such as
--graphor--tracingvia simple check-boxes.Advanced Options: Expand the hidden menu to configure advanced COMPSs settings.

Figure 80 Running a COMPSs application through the GUI.
Application Management
Dedicated actions for managing applications in remote environments.
Name definition: Assign a unique name to your application.
Source directory: Select the local folder containing the application code.
Main application file: Specify the entry point of the application.
Destination directory: Define the remote path (defaults to the .COMPSsApps folder).
Deploy: Launch the deployment process to the remote machine.
Application list: A side panel that displays all deployed applications, allowing you to refresh the list or remove selected entries.
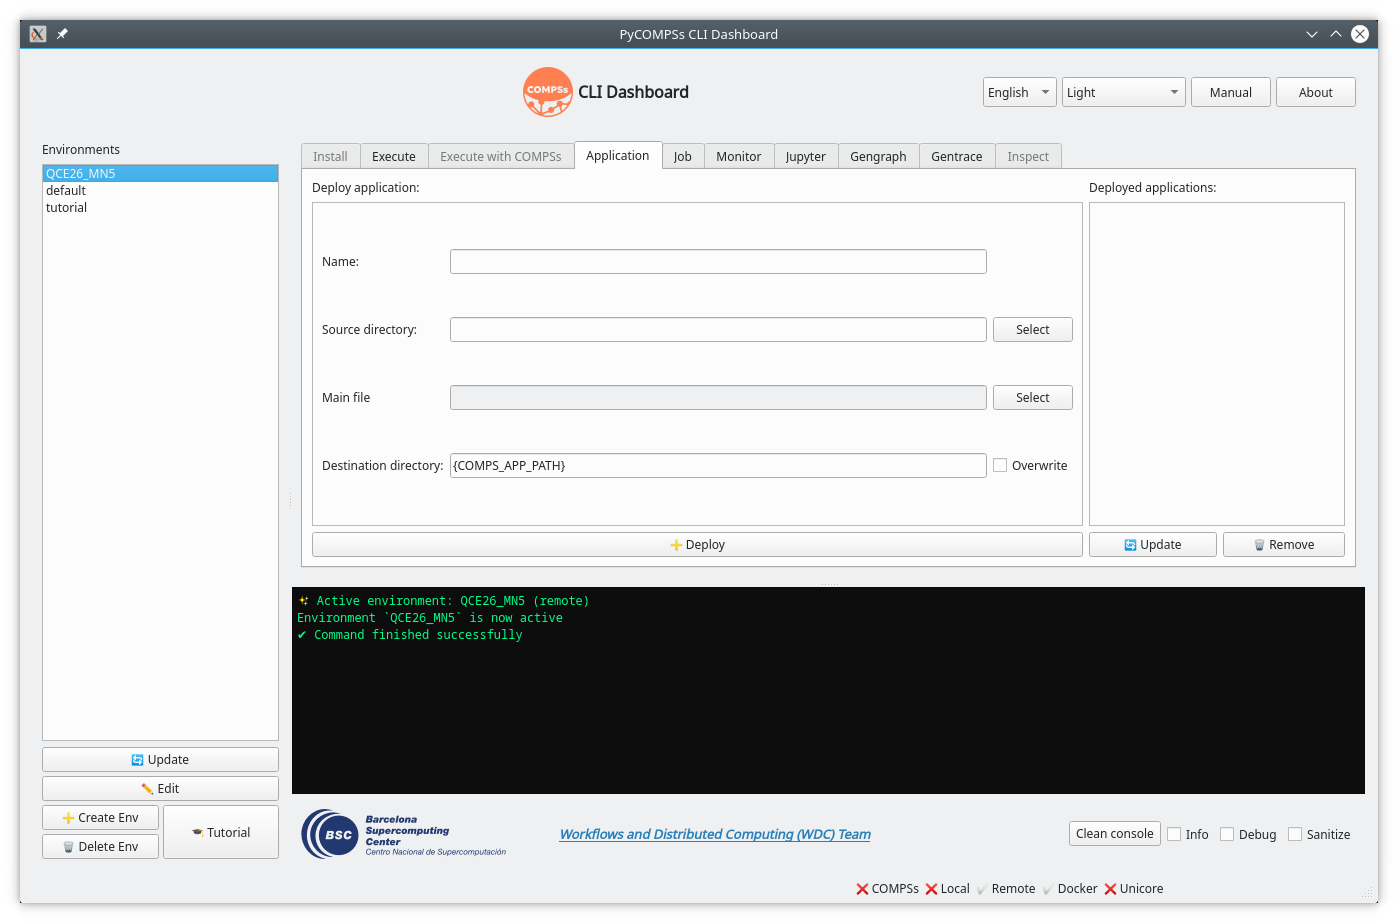
Figure 81 Application management for remote environments.
Job Management
Manage the execution of applications through remote job schedulers (e.g., SLURM).
Application selector: Choose from the list of deployed applications.
Execution flags: Configure COMPSs flags and job parameters (e.g., walltime, number of nodes).
Advanced options: Access additional submission settings.
Current jobs list: A panel showing the real-time status of submitted jobs, with options to refresh or cancel them.
Job history: A log of previously executed jobs.
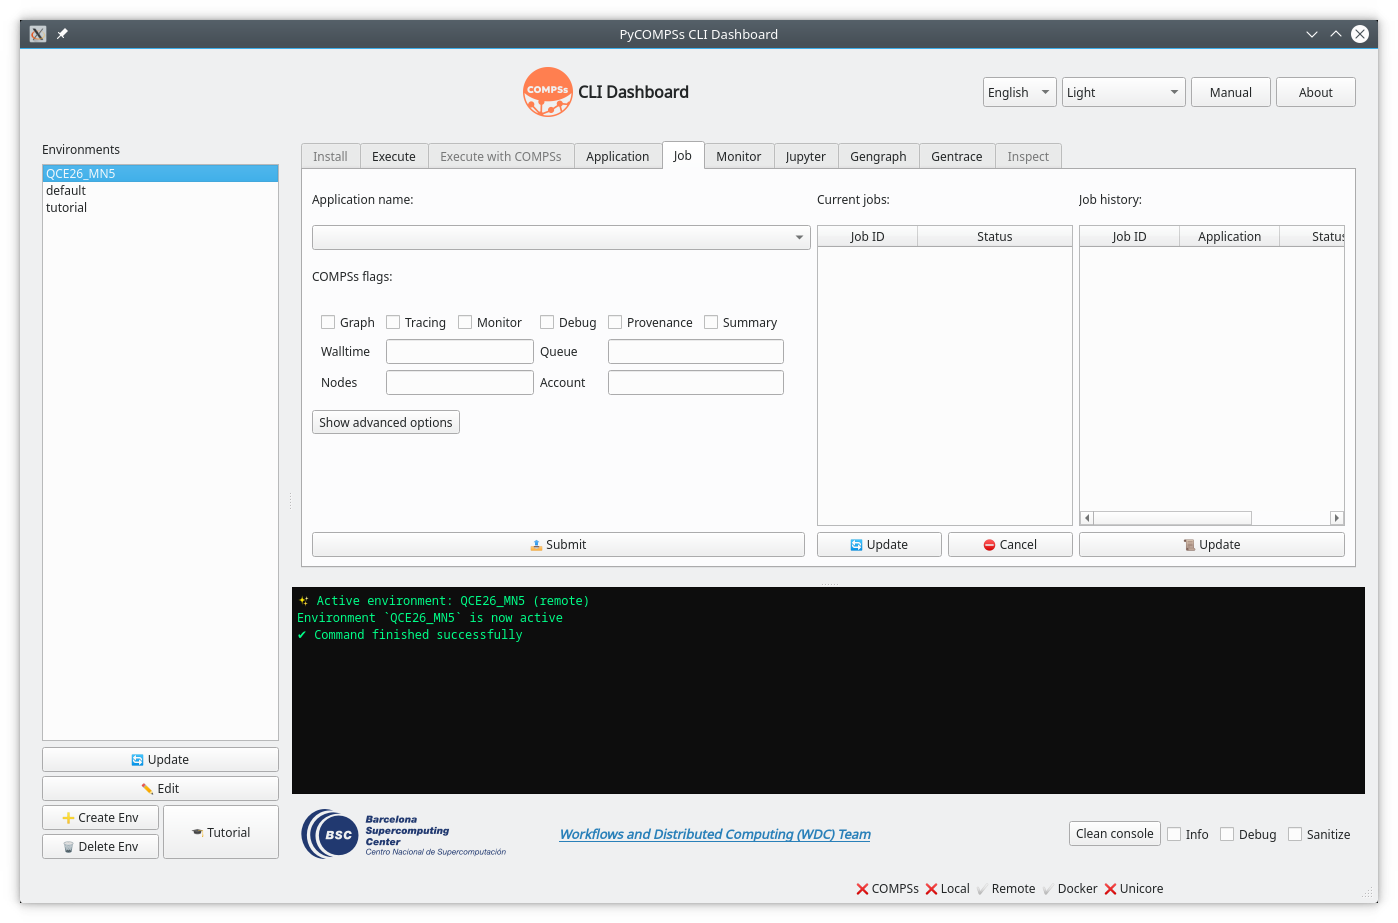
Figure 82 Job management for remote environments.
Monitor
Visualize your application’s behavior in real-time using the COMPSs monitor.
Monitor selector: Choose between the traditional or the new monitor.
Launch: Start the monitoring service with a single click.
Stop: Terminate the monitoring service.
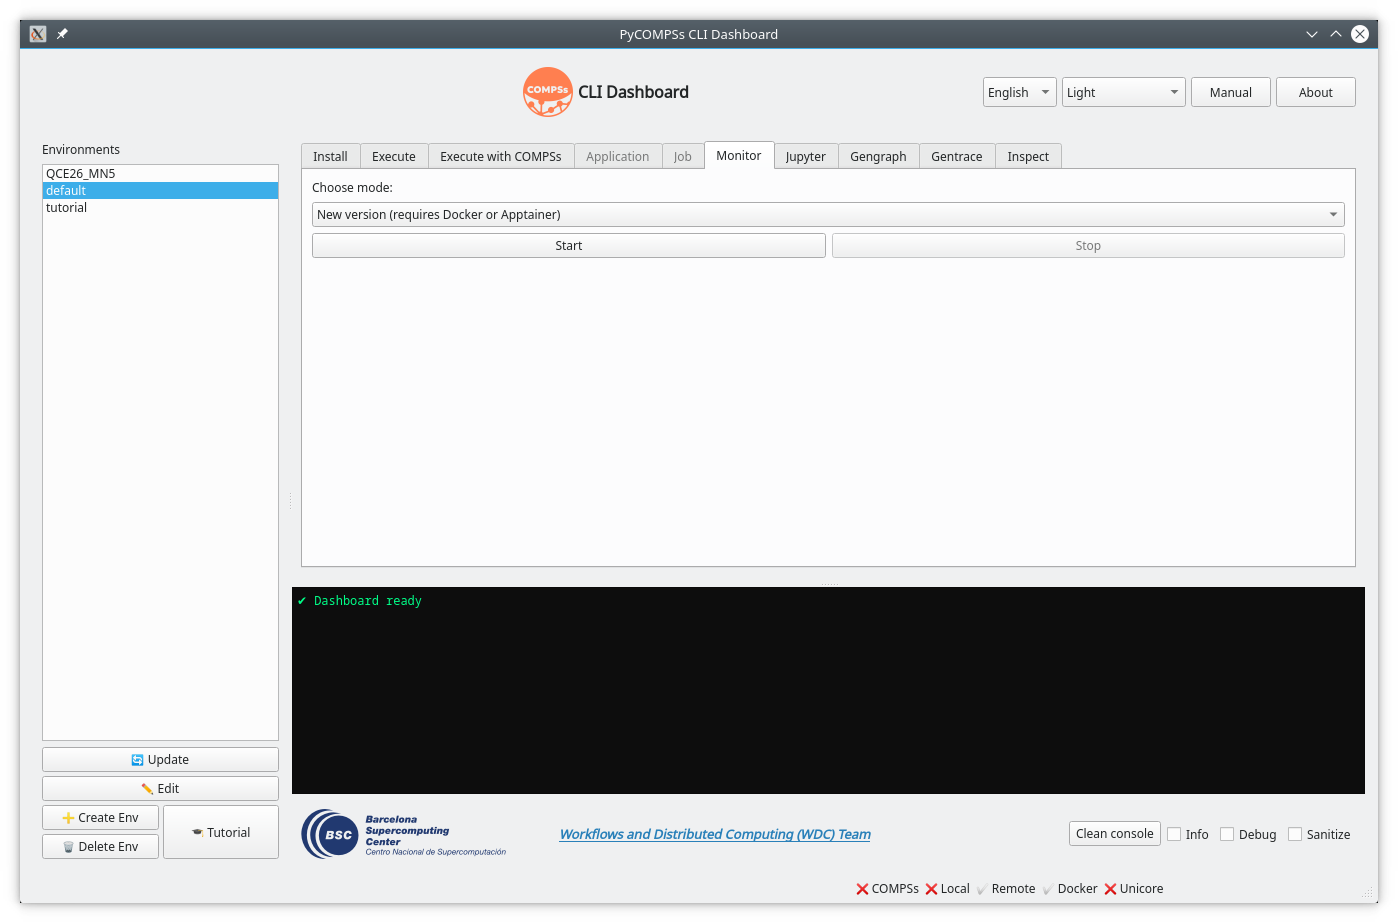
Figure 83 COMPSs Monitor tool management.
Jupyter
Interact with PyCOMPSs using Jupyter notebooks.
Launch: Start the Jupyter service.
Stop: Stop the Jupyter service.
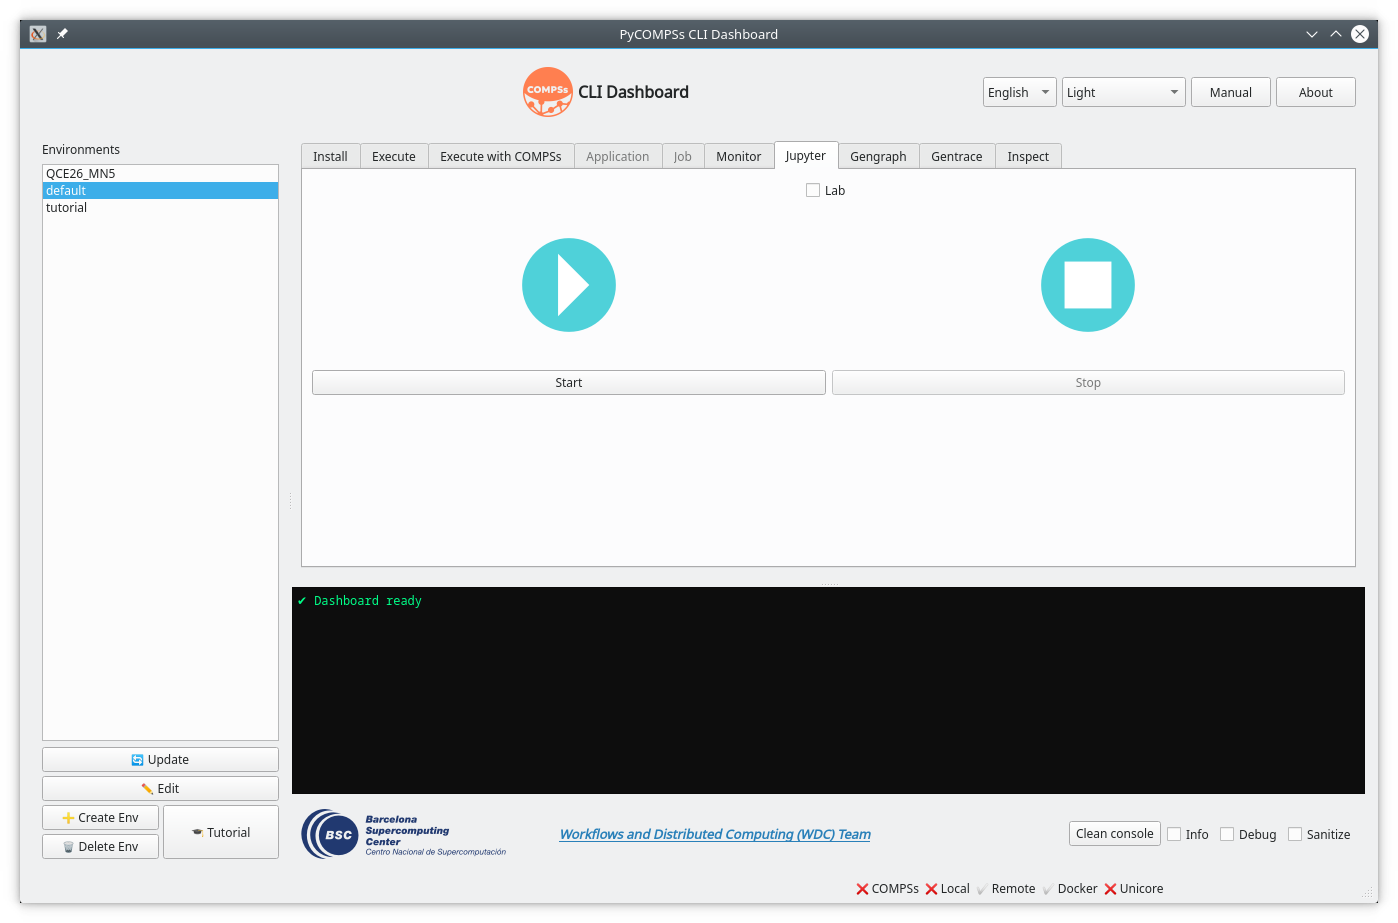
Figure 84 Jupyter notebook integration.
Task Dependency Graph Generator
Convert task dependency graphs from dot format to visual formats (pdf, jpg, or png).

Figure 85 COMPSs graph converter.
Trace Generator
Convert execution traces generated in remote environments (tar.gz files) into standard trace files (prv, pcf, and row).
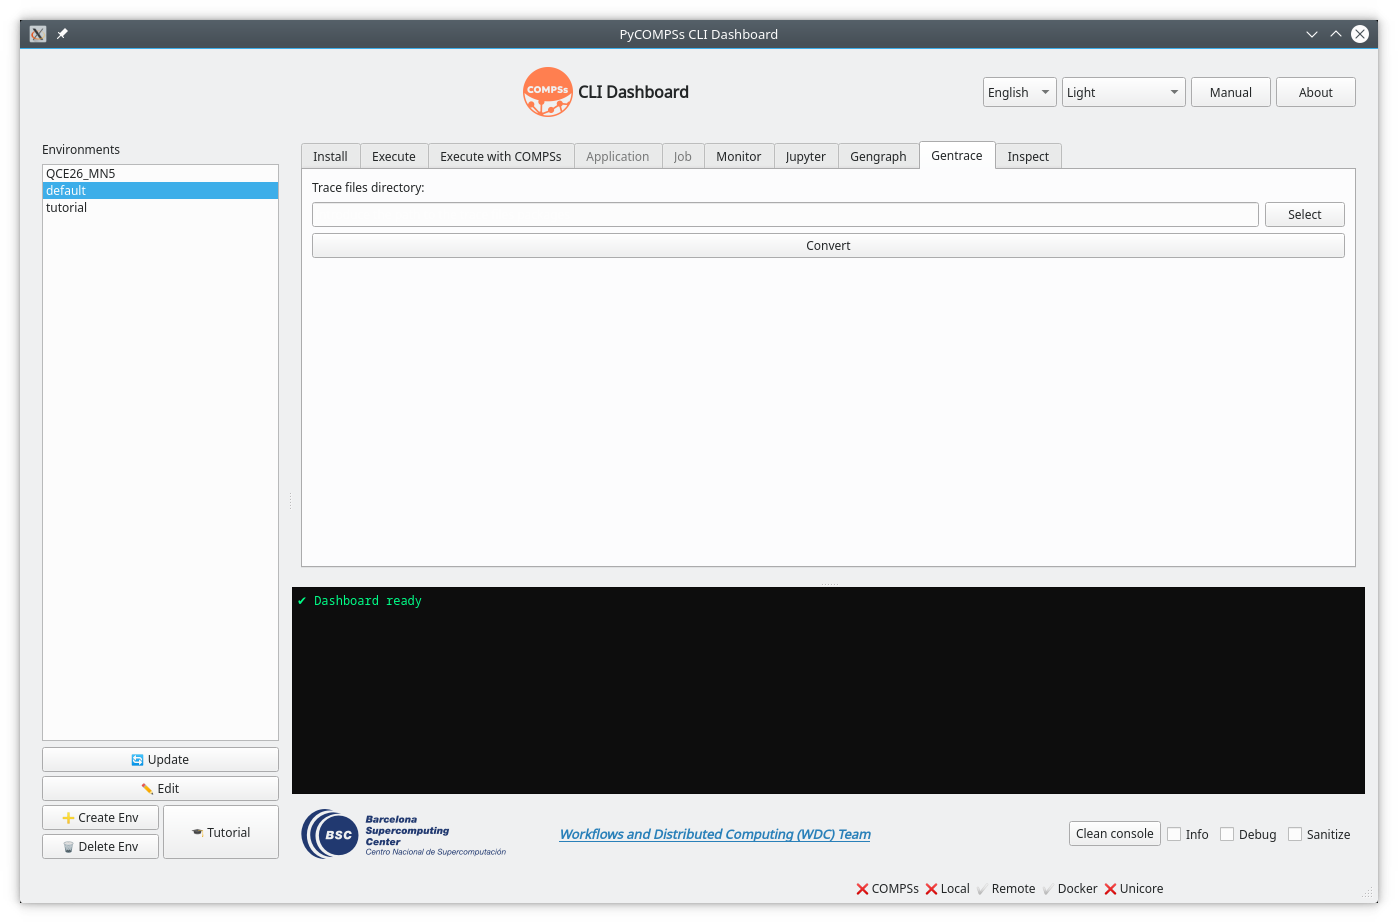
Figure 86 COMPSs trace converter.
Inspect
The GUI provides a visual interface for the inspect command.
Load an RO-Crate (as a folder or a zip file) to explore metadata, resource usage, and task details in an organized view.

Figure 87 Exploring workflow provenance visually.
💡 Pro Tip
Tip
The GUI and the CLI are fully synchronized. If you activate an environment in the terminal, the GUI will recognize it immediately, and vice versa!
Note
Since the GUI is a wrapper around the CLI, all the requirements mentioned in the Requirements section apply here as well.